Mark optional requirements as completed
Learn how to mark optional requirements as completed.
Marking a requirement as completed is a permanent action and can't be reversed. Make sure you understand why you're marking a requirement as completed, and the consequences of this, before you go ahead.
Why mark an optional requirement as completed?
Consider marking an optional requirement as completed if the user it's assigned to cannot mark it as completed themselves via My Organisation, or when you know they have completed the associated training.
What happens once the requirement is completed?
- Marking an optional requirement as completed updates the status of the requirement to "completed", indicating the requirement has been met.
- A learning record is also attached to the requirement evidencing the associated training is complete. Learn more about the relationship between learning records and requirements here.
- The requirement is moved to the "completed" section of the user's assigned learning list in My Organisation, so the user has a record of it.
Who is this article for?
- Users with access to Ausmed's Learning Management System
- Users with organisation or team manager permissions.
In this article:
How to mark optional requirements as completed
Only optional requirements with an open status can be marked as completed. View this article to learn more about a requirement's status - see section titled "What does the status of an optional requirement mean?"
Steps
- From the top navigation bar in the manager portal, go to Learning.
- From the left-hand-side menu bar, go to Reporting, then click Requirement Records, then click on the All Optional Requirements report.

- Run an All Optional Requirements report to retrieve the requirements you would like to mark as completed.
- Next, locate the requirements you would like to mark as completed in the Open view of the results.
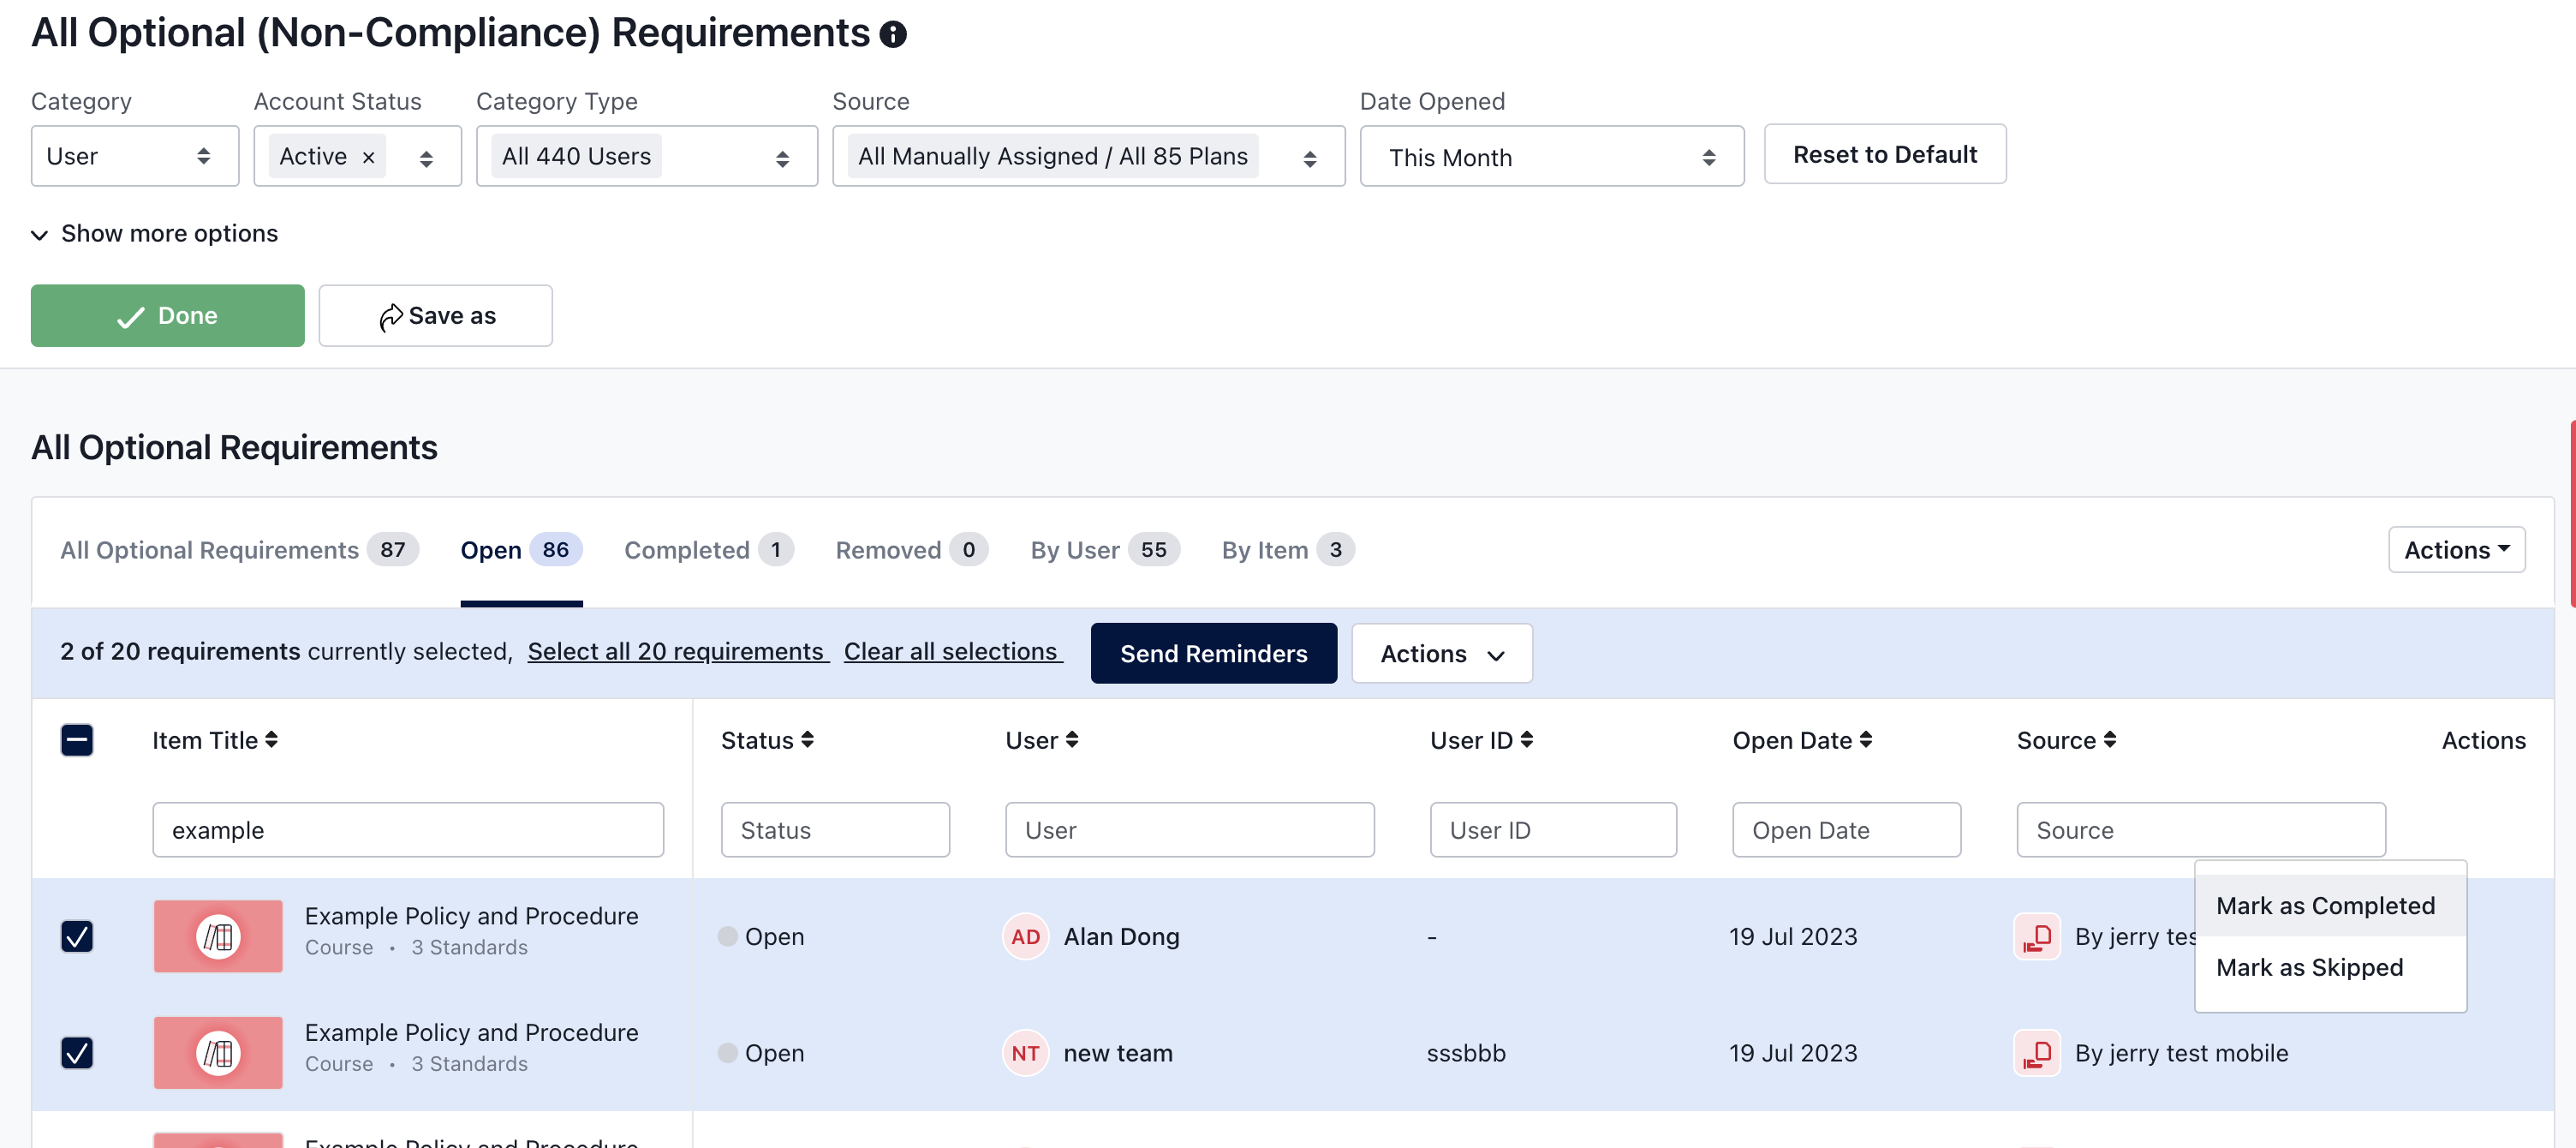
- Select the checkbox next to the Item Title column for the requirements you would like to mark as completed, then click the Actions drop-down, and click Mark as Completed.

Tips:
- If you would like to mark all requirements in view as completed, click Select all x requirements, where x is the number of requirements
- If you would like to deselect the requirements and start afresh, click Clear all selections, otherwise uncheck the box next to the Item Title column for any requirements you no longer wish to mark as completed.
- Click Mark as Completed to confirm the selected requirements should be marked as completed.
Note:
- The completion date of the selected requirements will default to today's date, but can be modified by changing the date in the completion date field.
- If you would like to double check the requirements you're about to mark as completed, click View x compliance requirements, where x is the number of requirements selected
- Click Mark as Completed to confirm the selected requirements should be marked as completed.
- The status of the requirements should now have updated to completed. Navigate to the Completed view in the results table if you would like to double check this.

If you found this article helpful, let us know by selecting "Yes" or "No" below. If you require further support, please contact Manager Support.