
Who this article is for:
- Users with access to Ausmed Events™
In this article:
- How to create an Event
An Event is any scheduled training session — in person, online, or a mix of both — that staff can enrol in and attend. This article covers how to create a single Event and configure all of its settings.
If you need to create several Events at once, see Add events using the bulk CSV upload instead.
How to start creating an Event
- Go to the Events Dashboard.
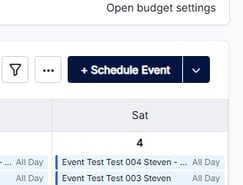
- Click Schedule event.
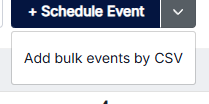
Tip: to add several Events at once instead, use the dropdown next to Schedule event and select the bulk upload option. See Add events using the bulk CSV upload.
- Event title (required)
- Event Type — choose Venue, Virtual, or Hybrid:
| Event Type | What's required |
|---|---|
| Venue | Venue |
| Virtual | Meeting Link |
| Hybrid | Both Meeting Link and Venue |
- Start date and time (required), End date and time (required)
- Timezone (defaults to your organisation's timezone)
- All Day Event — toggle on to ignore the specific start and end times
- Cover Image — optional, PNG or JPG
- Budget — defaults to No Budget
- You can add a per User cost OR
- You can add a whole event cost
- This will affect your Budget metrics on the dashboard
Click Next to continue to Content.
Step 2: Content- Event details — a free-text field for anything attendees should know before the session. Optional.
- Program — Add a program to the event from your Program Library. Optional.
- Practical activity — the practical activity that should be completed on attendance. Optional
- If no practical activity is added, an attendance record will be created on the user profiles instead
Click Next to continue to Facilitation.
Step 3: Facilitation- Event Owner — receives all notifications and manages the Event's settings.
- Facilitators — the people delivering the session.
- Allow facilitators to mark attendance — checked by default. Untick if you don't want assigned facilitators to be able to mark attendance themselves.
Click Next to continue to Enrolment & Visibility.
Step 4: Enrolment & VisibilityWho can discover this event?
| Option | What it means |
|---|---|
| Anyone in your Organisation | Visible to everyone |
| Targeted User | Visible only to specific job roles, teams and locations |
| Managers Only | Only visible in the manager portal |
How do people enrol?
| Option | What it means |
|---|---|
| Only manager can enrol | Staff can't enrol themselves |
| Staff can self enrol | Staff enrol directly |
| Staff can request to enrol | Requires manager approval |
Event Capacity — set a number, or tick Unlimited.
Optional extras (each shown as a checkbox you can expand):
- Add minimum enrolment alert
- This setting add a minimum enrolment requirement to the event
- The Event Owner will receive an email if the event does not meet the minimum threshold
- Enable waitlist
- Enables wait listing for your event
- See here for further information on Waitlisting
- Last enrolment date
- Set a last enrolment date for your event
Click Next to continue to Tags.
Step 5: TagsOptional — improves discovery and standards reporting. None of these fields are required.
- Topics
- Regulatory Standards
- Custom Standards
- Capabilities
Click Next to continue to Confirm.
Step 6: ConfirmReview your Event details, then submit to schedule the Event.
Tips- Fill in the Event details field in Content even though it's optional — it's how attendees know what they're showing up for.
- Program is optional, but Practical activity is required — you can run an Event without linking it to a Program, but not without a practical activity.
- Topics, Regulatory Standards, Custom Standards, and Capabilities must already exist in your organisation before you can select them.