Users are the people who need access to your organisation on Ausmed. There are two ways to add users to your organisation:
- Add single users manually one-by-one - recommended if you need to add less than 20 users in one go.
- Upload multiple users in bulk by importing a CSV file - recommended if you need to add more than 20 users in one go, or if you would like to update multiple users' details, teams or job roles.
Add single users
Steps
- Go to Administration or Learning in the top navigation bar of the manager portal, or go to Policies if you have access to Ausmed's Policy Management System.
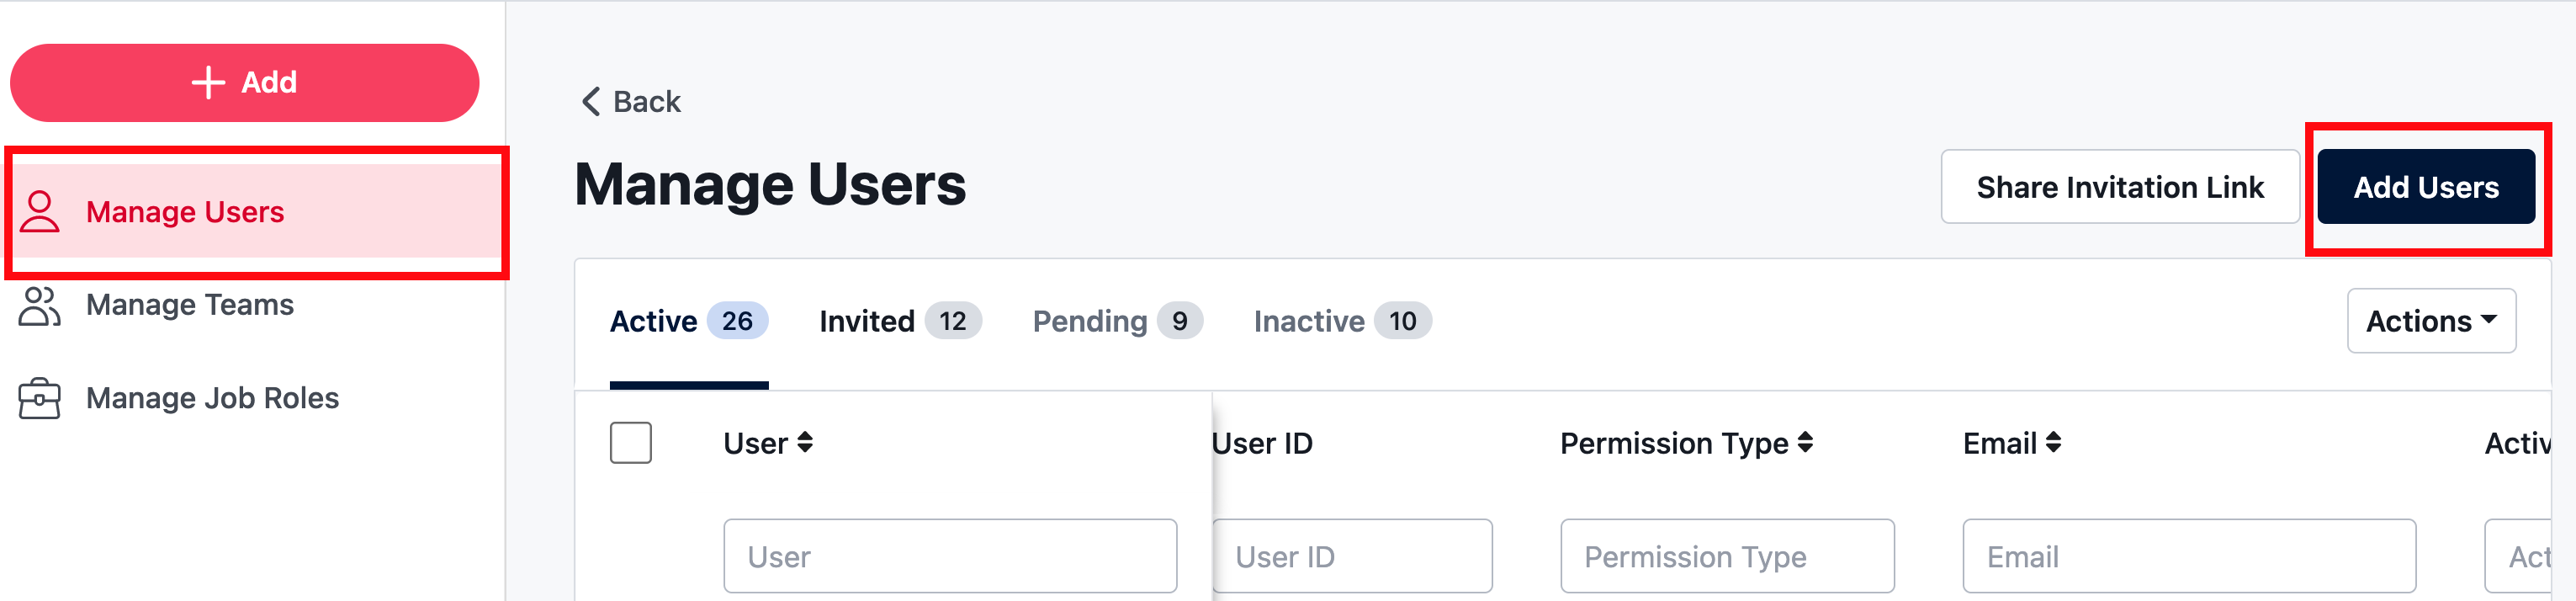
- From the left sidebar menu, click the +Add button
 , then click Add Users.
Note: If you're in Administration, you can also click Manage Users from the left sidebar menu, then click Add Users in the upper right
- Click Add Single User, then Continue.
- Enter the user's email address.
- Add the user's details:
- Full Name - the user's first and last name, separated by a comma.
- User ID - a set of letters and/or numbers to uniquely identify the user, such as an employee number or membership number.
- (Optional) Mobile Number - the user's mobile number.
- (Optional) Work Start Date - the date the user commenced employment at your organisation.
- (Optional) Employment Status - the current state of the user's employment at your organisation, which may be full-time, part-time, casual or contractor.
- (Optional) Add the user to one or more teams, then click Continue.
Note: If there are no teams to add the user to, it's possible they haven't been created yet. Learn more.
- (Optional) Add the user to one or more job roles, then click Continue.
Note: If there are no job roles to add the user to, it's possible they haven't been created yet. Learn more.
- Choose the user's permission type, then click Continue.
- (Optional) Enrol the user in one or more training plans, click to select their enrolment date, then click Add User.
Tip: Click Enrol More to enrol the user in multiple training plans.
- Click Send Invitation Now to invite the user to activate their account, or click Add Another User if you would like to add more users to your organisation. Alternatively, click Finish to exit the flow.
Upload multiple users
Note: Before getting started, learn how to prepare user data for import.
Steps
- Go to Administration or Learning in the top navigation bar of the manager portal, or go to Policies if you have access to Ausmed's Policy Management System.
- From the left sidebar menu, click the +Add button, then click Add Users.
Note: If you're in Administration, you can also click Manage Users from the left sidebar menu, then click Add Users in the upper righ
- Click Upload Multiple Users, then Continue.
- Select 'I don't have my own CSV file'
- Click Download CSV Template to download a template to prepare your user data if you haven't already done so.
- Click Upload CSV File to upload your user data for import, then click Continue.
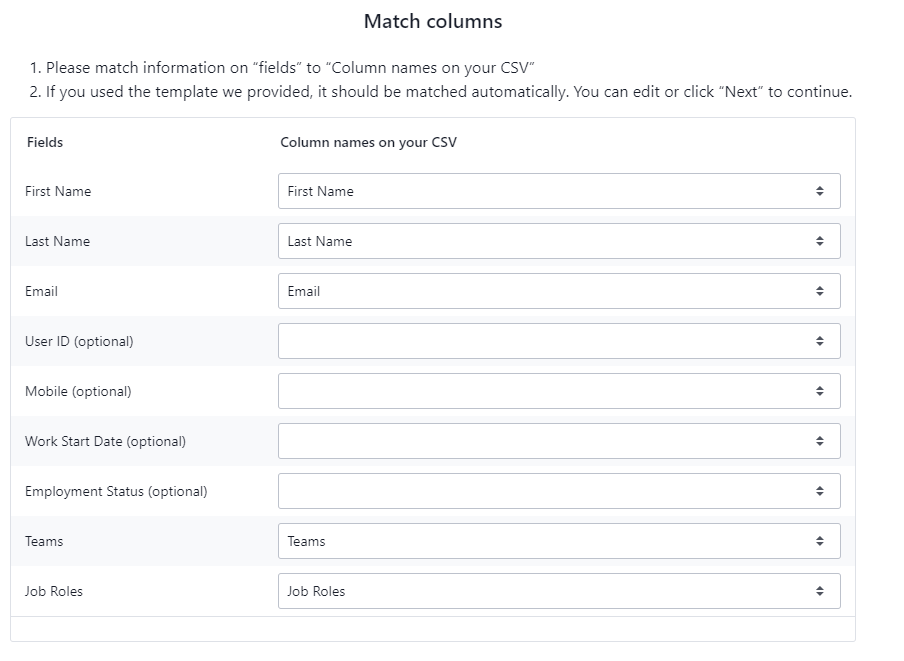
- Match the columns up from your spreadsheet to the correct columns in Ausmed. This should be done automatically if the column names match up - however if they don't, simply select the correct parameters from the drop down menu.
- Review the user data about to be imported using the Status column next to each user record, and the key provided:

- New - this user does not have an existing account and will be added to your organisation
- Updated - this user has already been added to your organisation, so their information will be updated.
- Invalid - this user won't be added to your organisation unless missing information is provided.
Tip: To correct invalid entries:
- Read the error message below the cell containing the invalid entry.
- Next, review this article for advice on how to prepare user data for import.
- Apply and save the changes to your CSV file, and click Back to import your updated file again.
- Click Upload Users to import the user data.
- Click Go to Pending Users to invite any new users to activate their account or click Close to exit the flow.
Upload multiple users (custom spreadsheet)
Note: Before getting started, learn how to prepare user data for import.
Steps
- Go to Administration or Learning in the top navigation bar of the manager portal, or go to Policies if you have access to Ausmed's Policy Management System.
- From the left sidebar menu, click the +Add button, then click Add Users.
Note: If you're in Administration, you can also click Manage Users from the left sidebar menu, then click Add Users in the upper right
- Click Upload Multiple Users, then Continue.
- Click 'I have my own CSV file'
- Click Upload CSV File to upload your user data for import, then click Continue.
Remember - your custom spreadsheet must include: First Name, Last Name, Team, Job Role at a minimum. - Match the columns up from your spreadsheet to the correct columns in Ausmed. This should be done automatically if the column names match up - however if they don't, simply select the correct parameters from the drop down menu.
- Review the user data about to be imported using the Status column next to each user record, and the key provided:
- New - this user does not have an existing account and will be added to your organisation
- Updated - this user has already been added to your organisation, so their information will be updated.
- Invalid - this user won't be added to your organisation unless missing information is provided.
Tip: To correct invalid entries:
- Read the error message below the cell containing the invalid entry.
- Next, review this article for advice on how to prepare user data for import.
- Apply and save the changes to your CSV file, and click Back to import your updated file again.
- Click Upload Users to import the user data.
- Click Go to Pending Users to invite any new users to activate their account or click Close to exit the flow.
If you found this article helpful, let us know by selecting "Yes" or "No" below. If you require further support, please contact Manager Support.